How to install plugin in wordpress
Install a Plugin using WordPress Plugin Search
The easiest way of installing a WordPress plugin is to use the plugin search. The only downside of this option is that a plugin must be in the WordPress plugin directory which is limited to only free plugins.
First thing you need to visit the Plugins » Add New page inside your WordPress admin area.

You will see a screen like the one in the screenshot above. Find the plugin by typing the plugin name or the functionality you are looking for. After that, you will see a bunch of listings like the example below:

You can pick the plugin that is best for you. Since in our search, we were looking for WPForms which is the best WordPress contact form plugin, we’ll click the ‘Install Now’ button next to it.
WordPress will now download and install the plugin for you. After this, you’ll notice the ‘Install Now’ button will change into the ‘Activate’ button.

A WordPress plugin can be installed on your site, but it will not work unless you activate it. So go ahead and click on the activate button to start using that plugin on your WordPress site.
That’s all, you have successfully installed your first WordPress plugin.
The next step is to configure the plugin settings. These settings will vary for each plugin therefore we will not be covering that in this post.
Install a Plugin using the WordPress Admin Plugin Upload
Paid WordPress plugins are not listed in the WordPress plugin directory. These plugins cannot be installed using the first method.
That’s why WordPress comes with the upload method to install such plugins. We will show you how to install WordPress plugins using the upload option in the admin area.
First, you need to download the plugin from the source (which will be a zip file). Next, you need to go to WordPress admin area and visit Plugins » Add New page.
After that, click on the ‘Upload Plugin’ button on top of the page.

This will reveal the plugin upload form. Here you need to click on the ‘Choose File’ button and select the plugin file you downloaded earlier to your computer.

After you have selected the file, you need to click on the ‘Install Now’ button.
WordPress will now upload the plugin file from your computer and install it for you. You will see a success message like this after the installation is finished.

Once installed, you need to click on the Activate Plugin link to start using the plugin.
You would have to configure the settings to fit your needs. These settings will vary for each plugin therefore we will not be covering that in this post.
Manually Install a WordPress Plugin using FTP
In some rare cases, your WordPress hosting provider may have file restrictions that could limit your ability to install a plugin from the admin area.
In this situation, your best bet is to install the plugin manually using FTP.
The FTP manager method is the least friendly for beginners.
First you will need to download the plugin’s source file (it will be a zip file). Next, you need to extract the zip file on your computer.
Extracting the plugin zip file will create a new folder with the same name. This is the folder that you need to manually upload to your website using a FTP client.
You would need to access your host through the FTP manager. If you do not have your FTP username and password, then contact your WordPress hosting provider and ask them.
Open the FTP client on your computer and connect to your website using the login credentials provided by your web host. Once connected, you need to go to the /wp-content/plugins/ folder on your website.
Next, upload the folder you extracted from the zip file to the /wp-content/plugins/ folder on your web server.

After uploading the files, you need to visit the WordPress admin area and click on the Plugins link in the admin menu. You’ll see your plugin successfully installed on the plugins page.

You need to click on the Activate link below the plugin to start using it.
Upon activating, you may need to configure the plugin settings. WordPress plugins come with their own settings which differ from one plugin to another so we will not describe them here.
FAQs About Installing WordPress Plugins
As a beginners you may have few questions about installing WordPress plugins. As the largest WordPress resource site, we have heard all of them.
Here are some of the most frequently asked questions about installing WordPress plugins.
1. How do I find the best WordPress plugins to install on my website?
There are more than 55,000 WordPress plugins on the free WordPress plugin directory alone. Many more are available as premium plugins. This makes it a bit difficult for beginners to find the best plugin for the feature they need.
We have compiled a list of all the essential WordPress plugins that most WordPress websites need.
We also have a detailed tutorial on choosing the best WordPress plugin where we show you what to look for when looking for a plugin.
2. What is the difference between installed and active plugins?
WordPress allows you to install a plugin and not use it at all. In order to use a plugin on your site, you need to ‘Activate’ it.
You can see active plugins by visiting the ‘Plugins’ page in the WordPress admin area. They will be highlighted with a blue background.

Plugins with the white background are installed on your website but not active.
3. Should I delete inactive plugins?
If you are not using a plugin, then it is recommended to delete it from your website. For more on this topic, see our article on why should you delete inactive plugins in WordPress.
4. How many plugins I can install in WordPress?
You can install as many WordPress plugins as you need. It is not the number of plugins that affect your website speed, but the quality of those plugins. For more information, see our article on how many WordPress plugins you should install.
5. How do I uninstall a WordPress plugin
You can uninstall a WordPress plugin by visiting the Plugins page in the WordPress admin area. If the plugin you want to remove is currently active, then first you’ll need to deactivate it. After that, you can simply click on the delete link to remove it from your website.

For more detailed instructions, see our guide on how to properly uninstall a WordPress plugin.
We hope this helped you learn how to install WordPress plugins.
You may also want to see our plugins category where we write about the best WordPress plugins that you can use to accomplish whatever you’re looking to do. Each of those articles comes with step-by-step instructions on how to set up individual plugins.
How to install plugins manually?
Installing plugins from the WordPress Dashboard is so easy that you probably never need to know how to install a plugin manually via FTP. But the technique is still helpful to know in case the WordPress Plugin Directory is down or unavailable.
The following steps take you through how to install a plugin using FTP, using the Gallery plugin as the example:
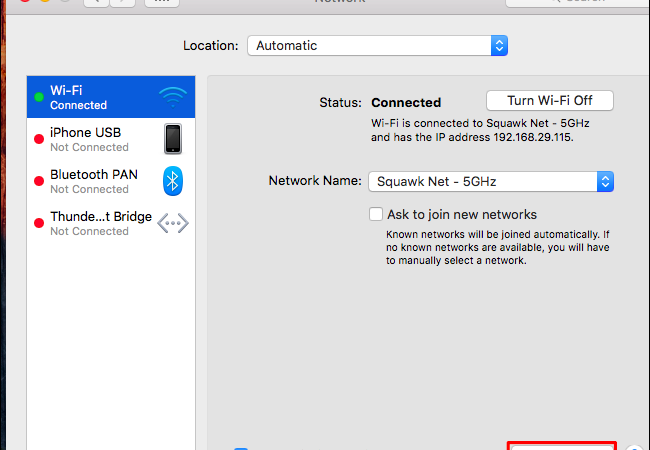
- Go to the plugin page from the WordPress Plugin Directory website.
- Click the red download button to transfer the plugin Zip file to your computer.
- Unzip the plugin files.All plugins downloaded from the Plugin Directory are in the Zip format. Most operating systems (Windows, Mac, and so on) have built-in tools to open Zip files. After opening the Zip file, extract the directory contained inside the Zip file and put it in a directory on your computer that is easily accessible.
- Connect to your site’s server using FTP.If you have any difficulty connecting to your server, contact your hosting provider and ask for assistance in connecting to your server via FTP.
- Navigate to the wp-content folder within the WordPress installation for your website or blog.The location of your WordPress installation can differ with every hosting provider. Make sure that you know the location before you proceed.
- Navigate to the /wp-content/plugins directory.First, navigate to wp-content. Inside this directory are the plugins and themes directories along with a few others. Navigate to the plugins directory. It is inside this directory that all plugins reside.
- Upload the plugin folder to the /wp-content/plugins directory on your web server.The plugin folder, named for the plugin (for example, if you’re uploading the Gallery plugin, the folder is /gallery) contains all the files for that plugin.
nstalling WordPress plugins might seem trivial to some, but we want to cover all the different ways you can go about doing this. This includes easy ways for beginners and more advanced methods; for those with a little more experience under their belt, like WordPress developers.
Today we will be diving into three different methods on how to install WordPress plugins on your website. This includes searching from within your WordPress dashboard, manually uploading a plugin via SFTP, and installing a plugin via WP-CLI. In these following examples, we are going to use the popular free Yoast SEO plugin, which is currently installed on more than 1 million WordPress sites.
- Install via WordPress Dashboard (easy/beginner)
- Install via SFTP (intermediate)
- Install via WP-CLI (advanced)
1. How to Install WordPress Plugins via Dashboard
Installing a WordPress plugin from within your dashboard is one of the easiest ways to get a plugin up and running fast. The first thing you do is under the plugins section of your WordPress dashboard click on “Add New.” You can then search for the plugin you want to install. In our example, we type Yoast SEO. You can also browse the featured, popular, and recommended plugins. Then click on “Install Now.”
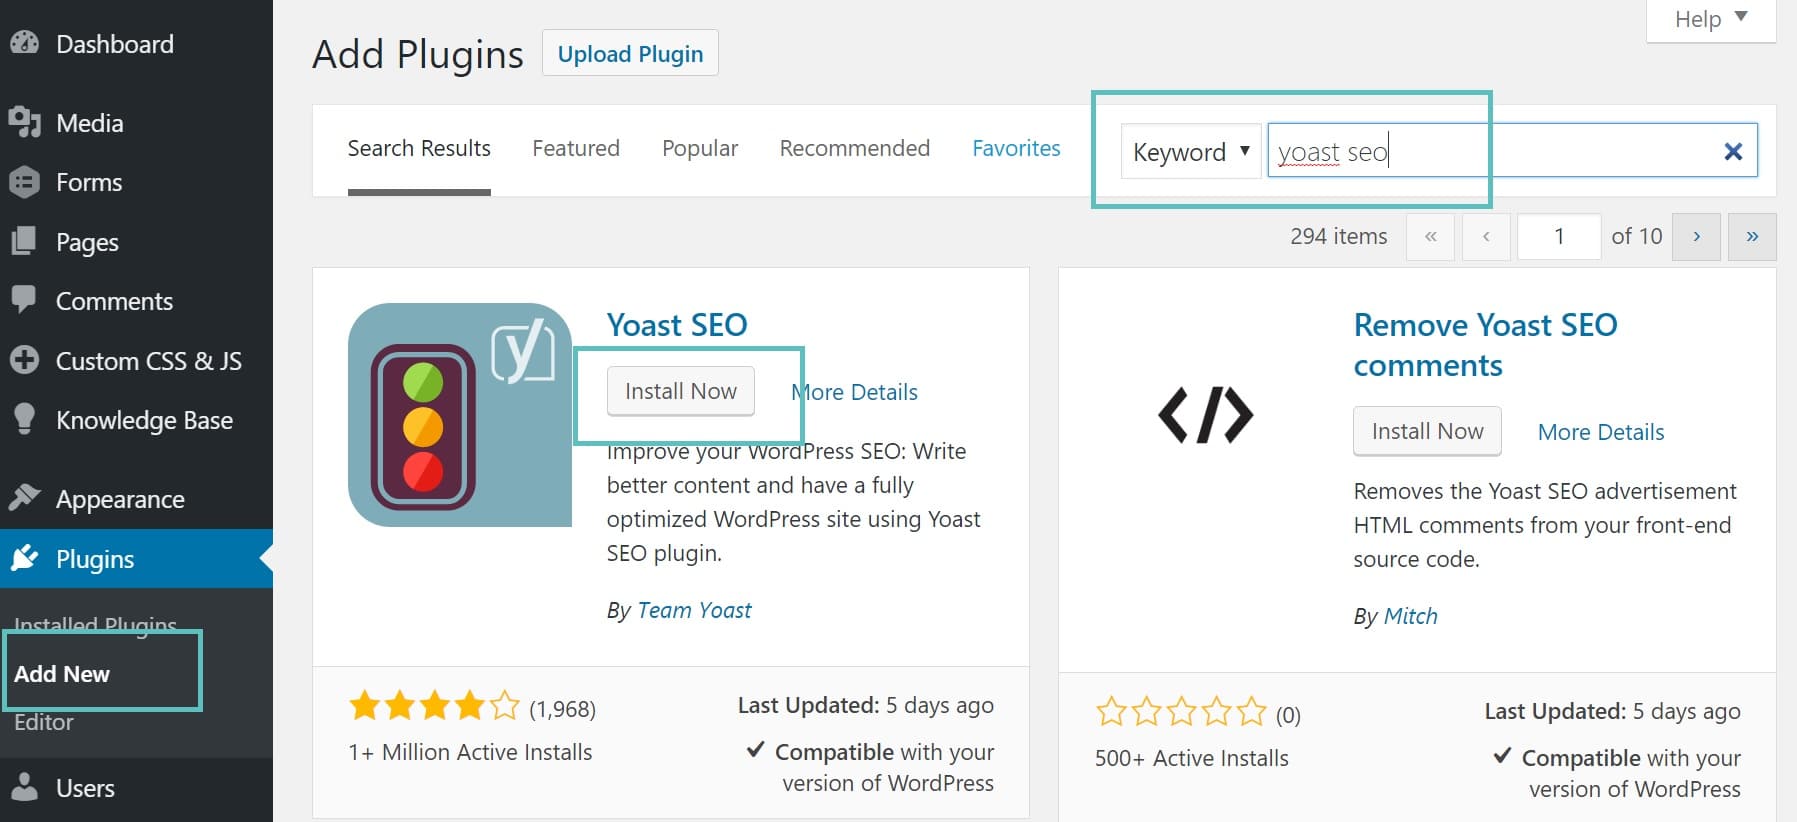
Add plugin in WordPress dashboard
Then click on “Activate.”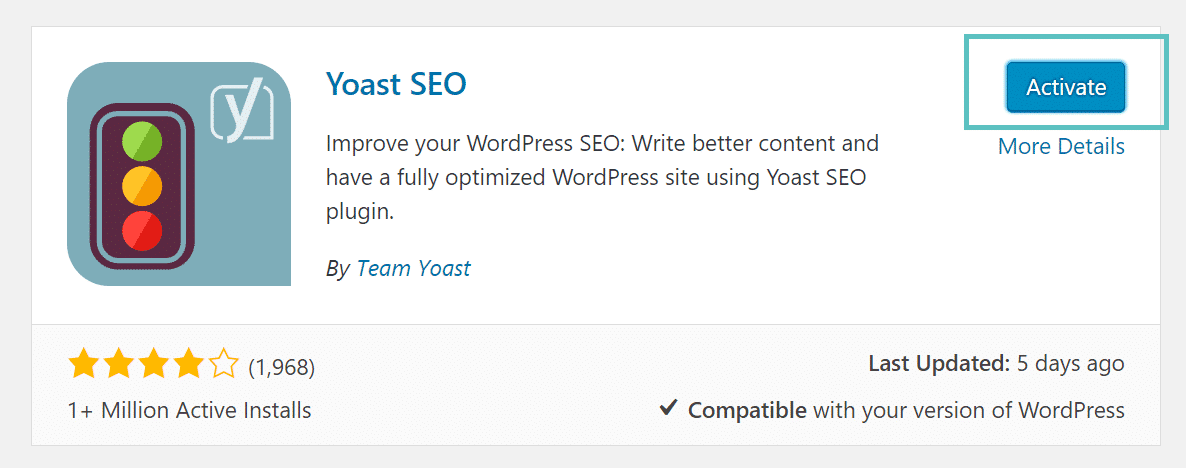
Activate WordPress plugin
And that is it! Your plugin is now installed, activated, and ready to use. Most plugins, especially the bigger ones will have an options menu that might appear on the left-hand side of your WordPress dashboard. For example, with the Yoast SEO plugin we now have an “SEO” menu in which we can now dig into the settings of the plugin.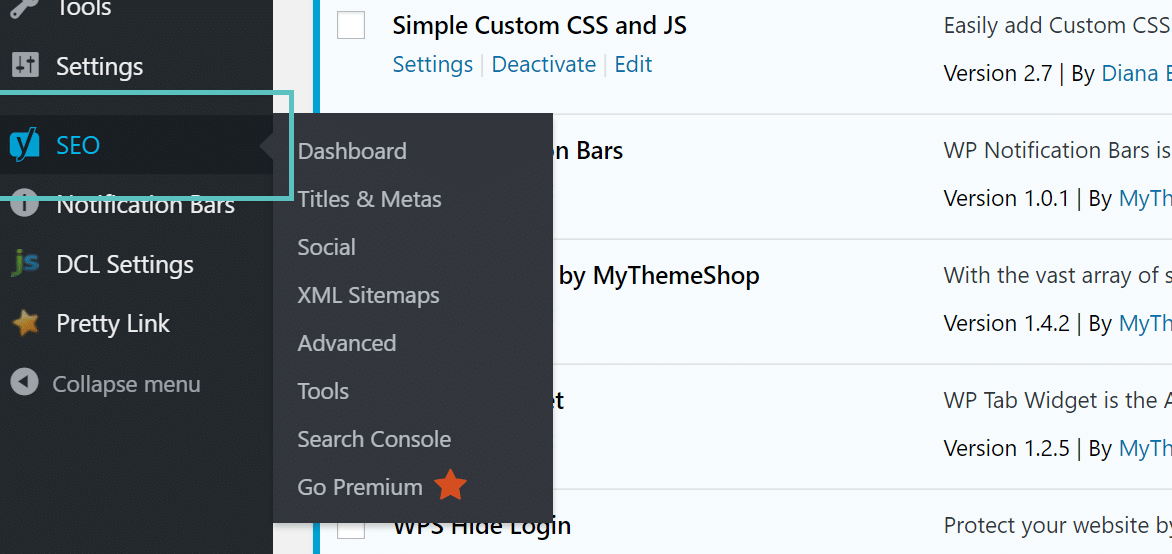
WordPress plugin settings
2. How to Install WordPress Plugins via SFTP
The 2nd way to install WordPress plugins is to do it manually via SFTP (secure FTP). In this example, we will be using the free Filezilla FTP client to upload the Yoast SEO plugin to our WordPress website. You can see our tutorial here on how to connect via SFTP. Depending upon who you host with the instructions will vary. You can refer to your provider’s documentation on how to connect to your site via SFTP.
The first step is to go to the WordPress repository and manually download the plugin. You can search for the plugin and then click into it.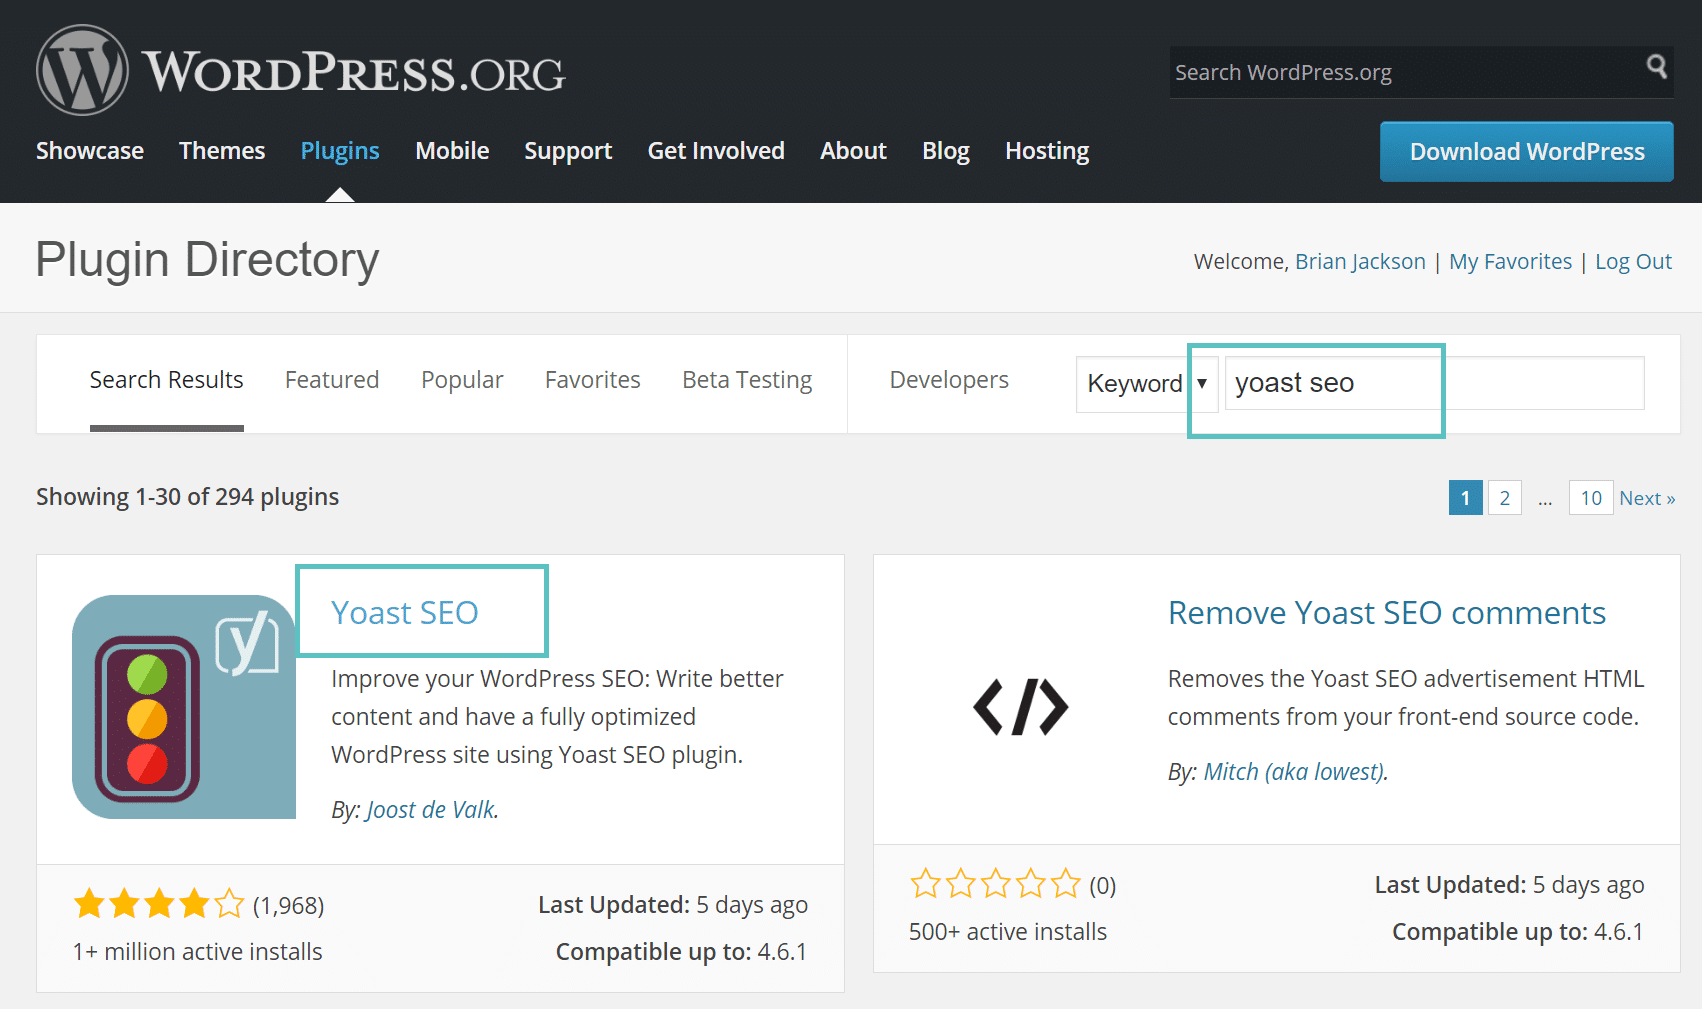
WordPress repository search plugin
Download plugin manually
You will then want to unzip the plugin.
Unzip WordPress plugin
Then via your FTP client, upload the plugin to your /public/wp-content/plugins directory. Note: You will need to grab the plugin folder within the named plugin folder. For example, under the wordpress-seo.3.5 folder there is another folder called wordpress seo. That is the folder you want to move over.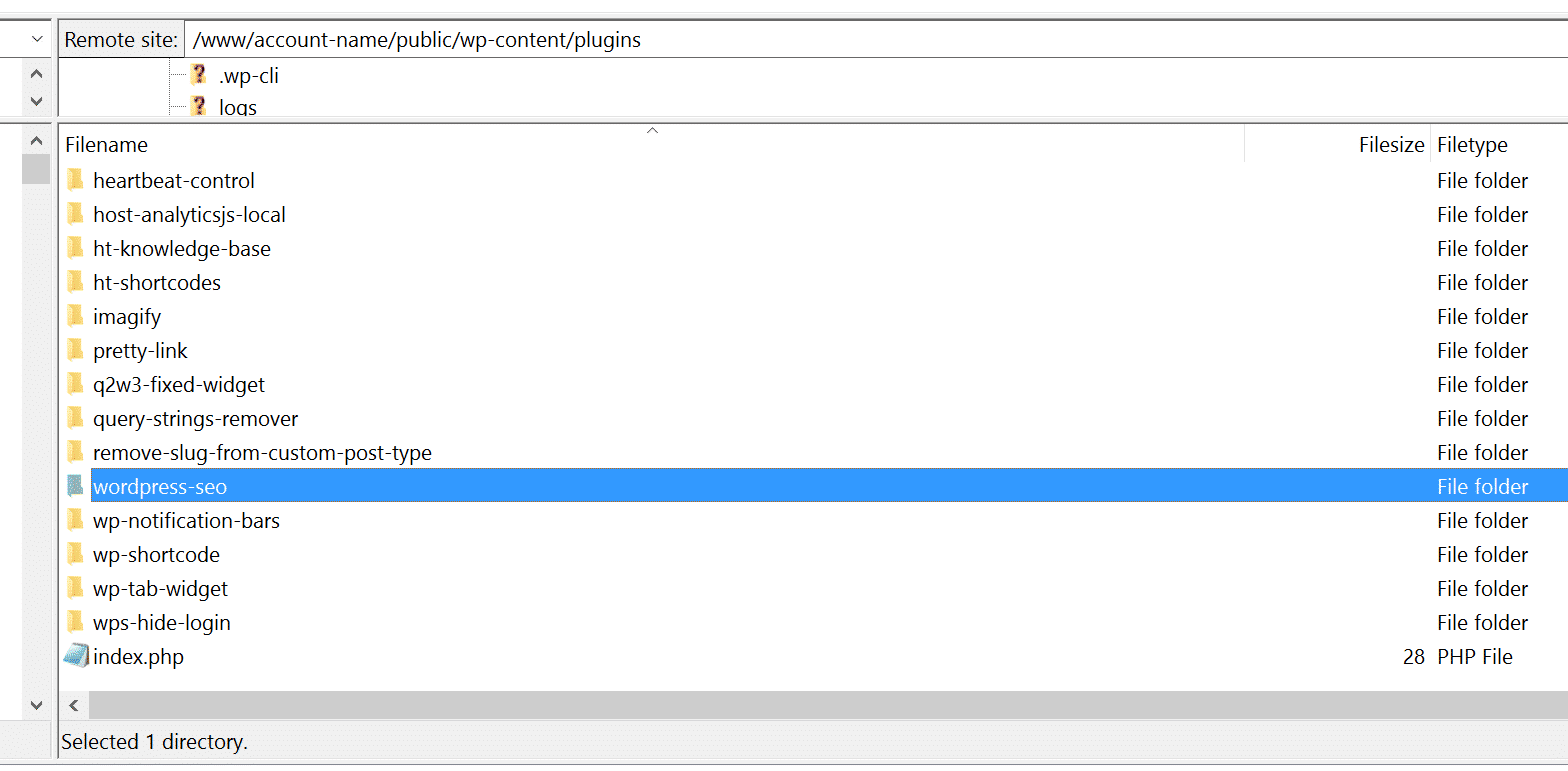
Install WordPress plugin via SFTP
Activate plugin via SFTP
3. How to Install WordPress Plugins via WP-CLI
The third and final way to upload a plugin to WordPress is via WP-CLI, which is a command line tool for managing WordPress. You can check out our more in-depth guide on using WP-CLI to get it installed. Once you launch WP-CLI you can run the following commands to install a plugin. First though, you will need to know the name. The name of the plugin you use for WP-CLI is simply the folder name on the repository or Git. So in this example, it is “wordpress-seo.”
WP-CLI install plugin
So from the command line, we enter the following:
wp plugin install wordpress-seo
wp plugin install
Then we run the following command to activate it.
wp plugin activate wordpress-seo
wp plugin activate
And that is it! As you can see WP-CLI is pretty fast and once you get used to it, can be a great way to manage your WordPress installations, plugins, and installs. Make sure to also check out the official WP-CLI documentation for additional commands and examples.