How to change the theme of wordpress
Before changing the theme you have to do the following 15 things to make your site safe.
1. Take Notes on Your Current Theme
Many WordPress users surf the web to find solutions to their problems. Often they find those solutions in form of snippets that they add manually in their theme such as the functions.php or another file. Because these changes were made once, people have a tendency of not remembering them. Go through your theme files and note down all additional code that you added. You also want to check your current theme’s load time because this way you can compare the two. Go to a site like Pingdom Tools or use YSlow to test out different pages (Yes different pages, not just the homepage).
2. Be cautious of the Sidebars
You must make sure that your new theme is widget-ready. Sidebar widgets are really easy to use therefore a lot of users use it to customize it. We notice that sidebars are probably the most user-customized area of WordPress sites. People make tons of changes such as adding custom texts, images, links, advertisement, and other widgets. If you are using a widget-enabled theme, and you switch to a theme that is not widget-ready, then you will lose all of that. If you are using a widget-enabled WordPress theme, then this is not an issue.
Also anything that you modify in sidebar.php file of your old theme, will be overwritten. So make sure that you add those codes in the new theme sidebar.
3. Don’t lose tracking
Most bloggers use some sort of analytics whether it be Google Analytics, or one of the other services. A lot of us don’t use plugins to add the tracking codes. Some of us open the footer.php file and modify the codes. Some of our themes have a spot to place the adsense code. Whichever one is your case, you want to make sure that you copy and paste your tracking code to your new theme. This is one of the things that is very commonly overlooked by users. Because it is so simple, most of us forget about it.
4. The Good ‘ol RSS are you working?
A lot of us use FeedBurner for our WordPress RSS Feeds. One of the parts of integrating FeedBurner into WordPress is pointing your default feeds to FeedBurner this way you can have analytics on your feed subscribers. A lot of themes like Genesis, Standard Theme, and others allow you to integrate FeedBurner from their settings panel. You need to make sure that you keep the feed directed to FeedBurner otherwise there will be two RSS feeds for your blog. The main WordPress one, and the FeedBurner one which is taking the info from your WordPress RSS Feed. Except, you will lose count of a lot of the subscriber that you had because they were subscribed using the /feed/ url which no longer points to FeedBurner. Again, this does not mean you lose them, it just means that you can’t see them in the FeedBurner count.
5. Backup!!
You never have anything to lose by creating a backup. As a precautionary measure, you should backup all of your theme files, plugins, and the database. Although nothing should happen, but you can never be too safe. You can use BackupBuddy to create a full-site Backup for you.
6. Maintenance Mode
You probably don’t want your users to see while you are making the switch because they will end up seeing a broken site or such. It is best to turn on Maintenance mode for 15 – 20 minutes that it may take you to make sure that everything is working properly. Once you have setup Maintenance mode, you are good to go ahead and activate the new theme.
7. Testing all functionality and plugins
Once you have the new theme activated, you need to make sure that you retain all the functionality and plugins still work. Remember that good ol’ notes list that you created in step 1. This is the time where that can come handy. Go back and add any and all functionality that you want to bring from the old theme into the new theme if you haven’t done so already. Try out all the features including but not limited to the commenting process, single post pages, search, 404 page, archive page, contact page etc. Make sure all of your widgets are still there and are working.
On the plugin front, you just want to make sure that the formatting is still the same. A lot of plugins utilize your existing styles to display their output. So you probably want to make sure that they still look good with the new theme.
8. Cross Browser Compatibility

Test your site in all browsers you have access to. Browsers have a tendency of rendering things differently. Specially Internet Explorer. You want to make sure that your design looks good in major browsers. Some pretty looking themes have a tendency of breaking in various browsers. So if a lot of your audience is using Internet Explorer, then you want to make sure that it is still accessible to them.
9. Make those Third Party Items look pretty
If you are using Google Adsense or another ad company that allows you to format them, then your best bet is to customize them. For example, you previous site was orange, so you had orange links for Google Adsense. Now if it is blue, then you probably want to take that into account.
Same goes for twitter widget, facebook like buttons etc. Adjust those with your new color scheme. If you are going from a light to a dark design, or vice-versa, then you need to make those changes.
10. Let your Users Know
Turn off maintenance mode, and write a quick blog post to let the users know. Notice, you only spent like 15 – 20 minutes on checking things. There is no way that you could’ve catch all the bugs. By letting your users know, you can expect to get bug reports. We often ask our readers on twitter (@wpbeginner) for bug testing. Ask your audience via twitter, facebook etc to see if the site looks good in their browser. If they say YES, then its good news. If they say NO, then ask them to please take a screenshot of the issue. You can take a look at the issue and try to fix it. If you can’t fix it, then kindly ask the developer of the theme to fix it. Notice: unless you paid for the theme, these developers are NOT required to fix those issues for FREE.
People have all sort of browsers, screen resolutions, etc, so getting their opinion is important. Don’t forget to remind your RSS readers to visit the site as well, so they can see the goodies.
11. Pruning plugins
Themes are now coming pre-loaded with a lot of features. For example, if you are using Genesis or another theme that has BreadCrumbs, then you can get rid of Breadcrumb plugin of yours. The concept is simple. Get rid of things that you don’t need. One thing you should make sure though is often plugins can do the job better. For example a lot of themes are coming with tons of SEO features. Genesis, Thesis, Standard Theme, and all others boast their SEO features. We’d rather use a much more powerful plugin like WordPress SEO by Yoast. Make your choices wisely.
12. Take Baby Steps when Changing
You are working with a new theme here, so it is probably best that you make changes carefully. Change smaller elements to make sure that it behaves properly in all browsers. Then once you are comfortable enough, then you can make drastic changes. It’s important to learn the structure and semantics of the new theme before you make huge changes. This will allow you to detect the problem right away.
13. Test Loading Time
Take the load time numbers that you had on your old theme (from item 1 of this checklist), and compare the two. See what you can do to improve load time by checking out Syed’s presentation on Slideshare.
14. Monitor Bounce Rate
After switching themes, you want to make sure that you are monitoring bounce rate. Some themes are just more friendlier than others when it comes to navigating the readers around your site. If your bounce rate has increased compared to the previous theme, then you should probably work on that. Add related posts widgets, popular posts widgets, or simply have a better call-to-action for new readers.
15. Listen to your readers, and IMPROVE
When a new design comes out, users always have suggestions. They either love a specific feature, or hate a specific feature. Communicate with your audience using surveys or Facebook Polls. See what they would like to see improved, and then work on getting that done.
How to change a WordPress theme the right way
In this section, I’m going to focus entirely on the “how” part of how to change a WordPress theme. But we’ve also already written a post with some steps to take before changing your WordPress theme.
I encourage you to read that post for more details. But in general, we recommend that you:
- Back up your site
- Create a staging site (if possible)
Once you have a backup (at a minimum), you’re ready to move on.
Step 1: Install new WordPress theme
To get started, you need to install the new WordPress theme that you want to use.
To do that:
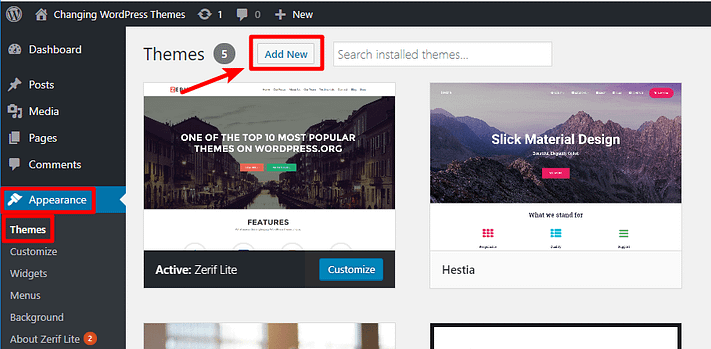
- Go to Appearance → Themes
- Click on Add New
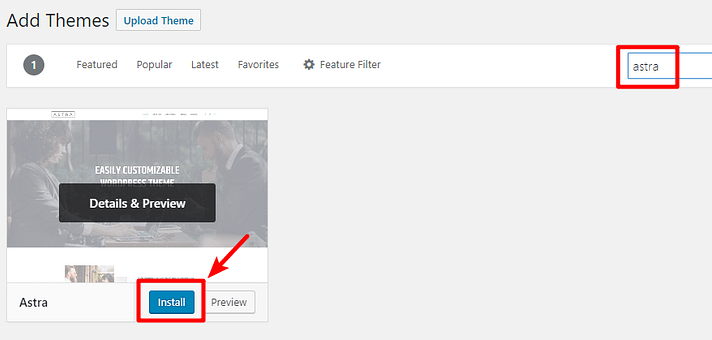
If you found your theme at WordPress.org, you can search for it by name and click the install button:
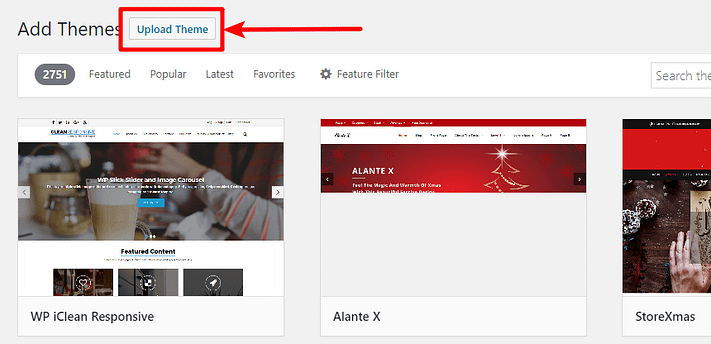
And if you purchased a premium theme or otherwise have a ZIP file, you can upload the ZIP file by clicking the Upload Theme button:
Once you install your new theme, don’t click the activate button yet, though.
Step 2: Preview new theme with WordPress Customizer
The WordPress Customizer has a helpful feature that lets you play around with your new theme on a live preview of your site before making it active.
This is helpful because it:
- Lets you see how your new theme looks with your existing content
- Gives you a chance to correct any issues with menus or widgets
Here’s how to use the WordPress Customizer to preview your new theme:
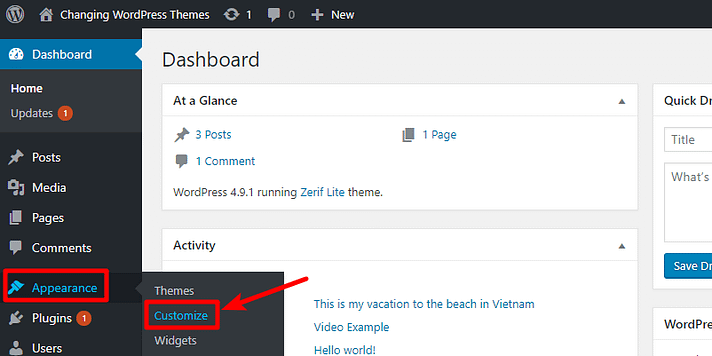
- Go to Appearance → Customize in your WordPress dashboard
- You should see a live preview of your current theme
- Click Change in the Customizer sidebar
- Click the Live Preview button next to the new theme that you installed in the previous step
Now, you should see a live preview of your existing content using your new theme:
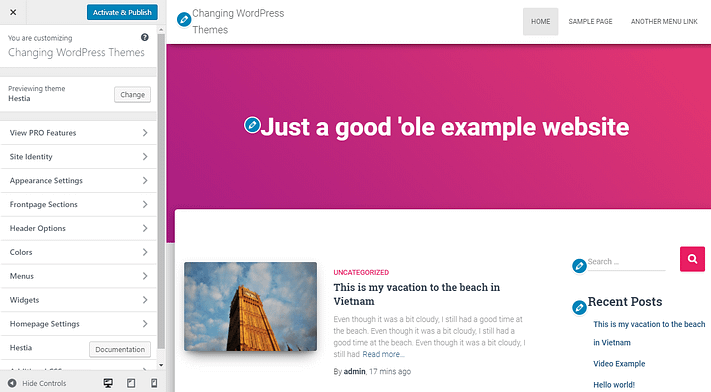
You can see that, on my example site, WordPress was actually able to correctly sync up the existing menus and widgets with the new theme.
Hopefully the same happens to you!
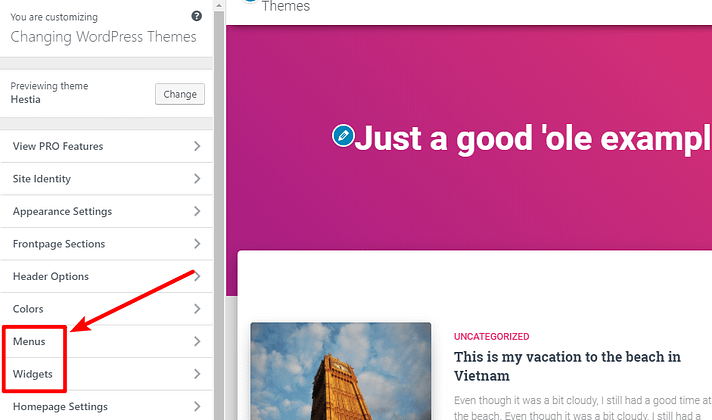
But if it doesn’t, you can also use the Menus and Widgets options in the Customizer sidebar to fix any issues that you see:
Assuming your new theme makes use of the WordPress Customizer, you can also make other tweaks. And you can also click through your site to see how other pages look. For example, if you click on a blog post, WordPress will load that blog post using the preview of your new theme.
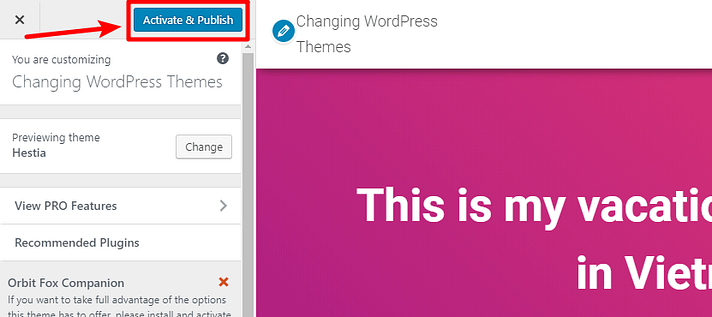
Step 3: Activate new theme
Once you’re happy with how things look, to make your new theme live, all you need to do is click the Activate & Publish button:
And that’s it! You just learned how to change a WordPress theme.
Wrapping things up
Most people will want to switch themes at some point in their time with WordPress, so learning how to change a WordPress theme is something that every WordPress user should know.
While the actual process itself is simple, doing it the right way helps ensure that you don’t just switch themes, but also that your site functions just as well with your new theme as it did with your old theme.
Remember, here’s all you need to do:
- Install your new theme
- Preview your new theme before activating it by using the WordPress Customizer
- Make sure your menus and widgets look right
- Activate your theme from the WordPress Customizer to make it live
If you have any other questions about how to change a WordPress theme, leave a comment box.