How to solve the black screen problem of laptop

Method 1: Restart the explorer.exe process
You may get the black screen issue because the explorer.exe process on your computer has been closed (possibly by a virus). It is a process that manages the desktop, taskbar, etc, on your operating system. Closing it can make your desktop and taskbar invisible, and you get the black screen issue.
To fix this issue, you can check and restart the process manually. To do so:
1) Press the Ctrl, Shift and Esc key on your keyboard at the same time. This will open Task Manager.
2) Click the Details tab (or the Processes tab in Windows 7’s Task Manager) and see if there exists a process called “explorer.exe“
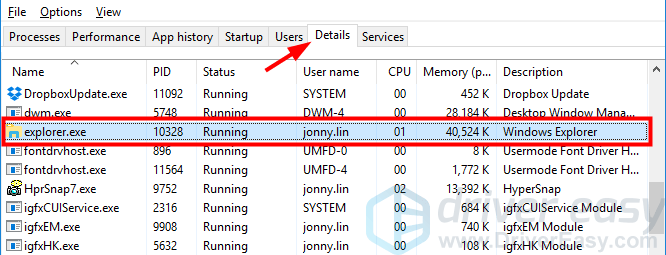
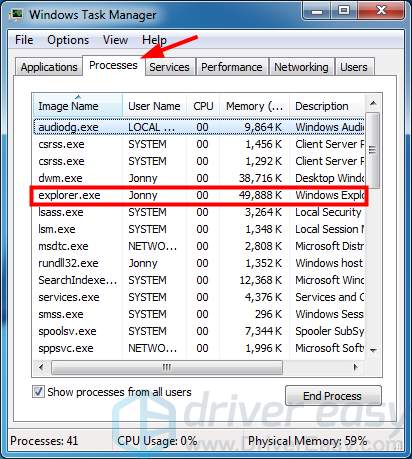
If there is, try ending the process (right-clicking it and selecting End task or End process) and then reboot your computer. Then check to see if this fixes your problem.
But if you can’t see the explorer process, you can run it on your own:
i. Click File and click Run new task.
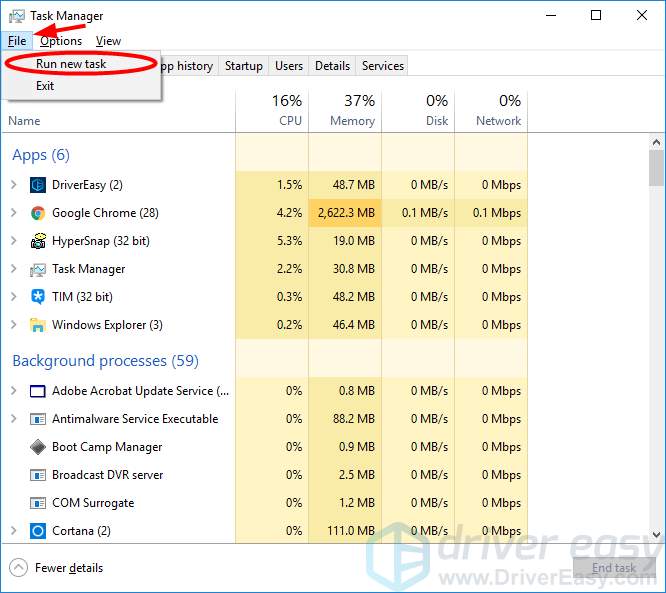
ii. In the Create new task dialog that pops up, type “explorer.exe” and press Enter on your keyboard.

iii. The process will run and you can see if your desktop becomes normal.
3) If the steps above bring your desktop back, you may need to restore your system to a previous state in order to prevent your issue occurring again.
Method 2: Enter safe mode and undo recent changes
You may have change some settings or installed a program on your computer, which are incompatible with your operating system. And it causes the black screen problem of your laptop.
You can try going into safe mode of your system and undo these changes. Safe mode is a diagnostic mode of your operating system. You can use it to troubleshoot issues on your computer. The method of entering safe mode varies depending on the Windows version you are using. You can check this guide to learn how to do this.
When you are in safe mode, undo the recent changes you have made to the system settings. Or uninstall the program you have recently installed on your program. If you have updated your system right before you got the black screen issue, uninstalled these updates and contact Microsoft for advice. If you are not clear what you have changed, it is recommended that you use System Restore feature to revert your computer’s state.
Method 3: Hard reset your laptop
Hard resetting your laptop can clear all the information in your memory and the charges in your laptop. This is helpful for restoring your laptop screen. To hard reset your laptop:
1) Turn off your laptop.
2) Disconnect all the peripheral devices on your laptop.
3) Remove the battery. (If it is not removable, skip this step.)
4) Disconnect the power cable from your laptop.
5) Press and hold the power button on your laptop for about one minute.
6) Connect the power cable to your laptop and turn it on.
7) Turn off your laptop.
8) Connect the battery to your laptop and turn it on.
9) If this method works for you, you will see there starts to be something showing up on your laptop screen.
Note that this method may not be able to hard reset laptops of all makes. You can consult the official guides for your laptop for the proper way of hard resetting your device.
Method 4: Reinstall your memory
It is also possible that your laptop screen issue comes from your laptop memory (RAM).
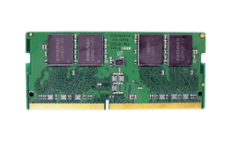
It has gone wrong and stops your laptop from completing the self test. You can try reinstalling your laptop memory and see if this can fix your screen issue.
To do so:
1) Turn off your laptop and disconnect the power cable and the battery from your device.
2) Remove the cover on the memory module compartment on the back of your laptop. (You may need to check the manual or the official guides of your product for instructions on how to do this.)
3) Remove the memory from your laptop.
4) Rub the golden contact of your memory with an eraser. (This can clean the golden contact of your memory.)
5) Install the memory back to your laptop.
6) Place the memory module compartment cover back to your laptop.
7) Turn on your laptop and see if your issue is fixed.
Method 5: Have your laptop serviced
If none of the methods above could help you, your issue may be a hardware problem that you can’t solve yourself. You may need to ask a computer expert to help you. If your laptop is still under warranty, you can contact the manufacturer of your device. They can check your laptop and get it repaired or replaced.
Extra tips
If you have resolved the problem with your laptop screen, it is suggested that you try the things below to totally get rid of this issue and keep your computer healthy.
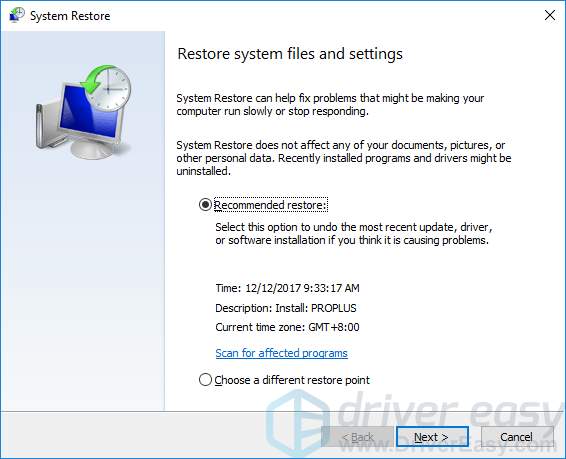
1. Restore your system from a restore point
Once your laptop recovers, you can restore your Windows from a system restore point. This can prevent your computer from getting issues resulting from the previous changes you have made.
Note that you can restore your system only when you have previously created a restore point.
To restore your operating system:
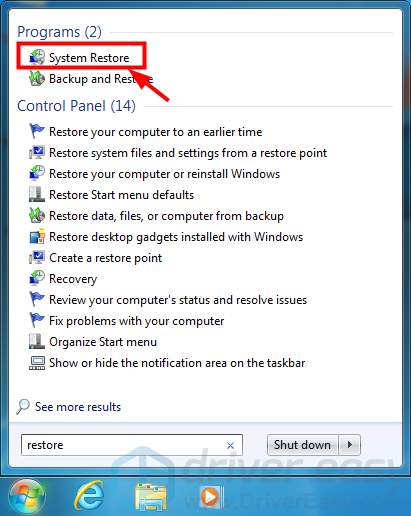
1) Click the Start button in the bottom left corner of your screen. Then type “restore“.
2) Open the System Restore wizard from the list of result.
The process is different depending on the operating system you use, and you will see from the following the different steps on Windows 7 and Windows 10.
On Windows 7, just click System Restore in the search result:
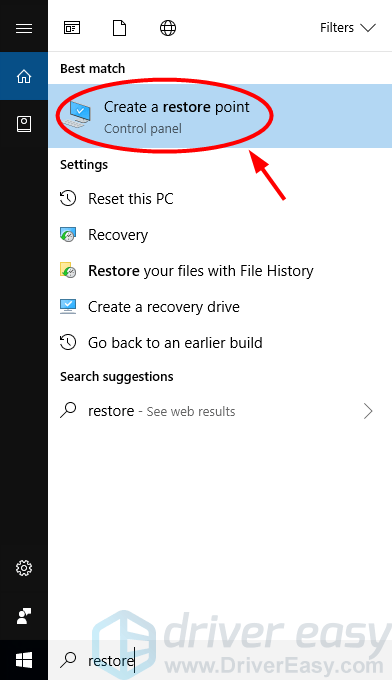
On Windows 10, click Create a restore point,
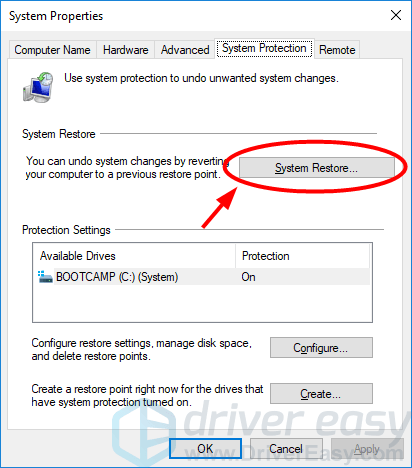
And then in the dialog popping up, click the System Restore button.
3) In the System Restore wizard, follow the instructions to select a restore point and complete the restoration.
2. Update your device driver
You may get various hardware issues (not just this black screen one) if your device drivers on your computer are wrong or out of date. To keep your laptop healthy, you should make sure your drivers are updated.
You can update your drivers manually, but the process can be very time- and energy-consuming. If you want it to be easier, you can use Driver Easy.

Driver Easy will automatically recognize your system and find the correct drivers for it. You don’t need to know exactly what system your computer is running, you don’t need to be troubled by the wrong driver you would be downloading, and you don’t need to worry about making a mistake when installing.
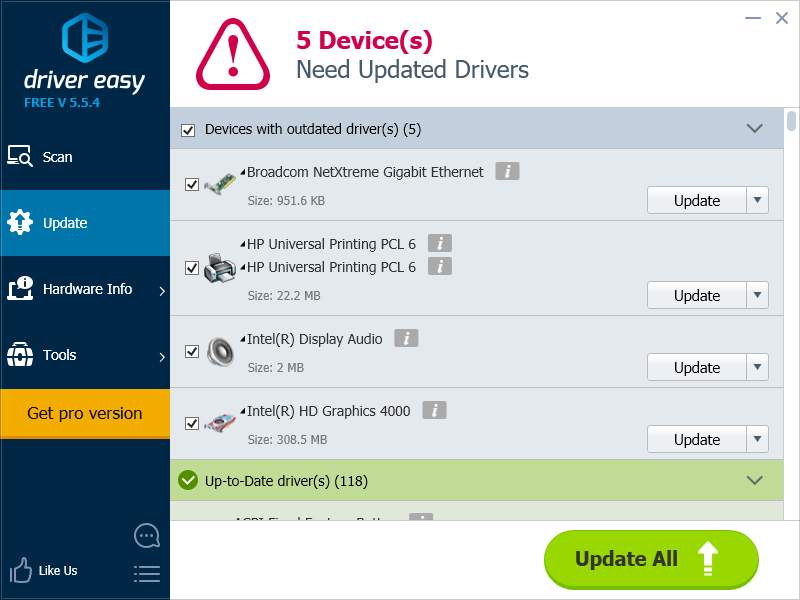
You can download and install your drivers by using either Free or Pro version of Driver Easy. But with the Pro version it takes only 2 clicks (and you get full support and a 30-day money back guarantee).
Laptop Is Turning On But No Display
“I’ve been experiencing problems with my HP Pavilion laptop. The power button light turns on but nothing appears on the screen. How to solve the laptop turns on but no display issue without affecting data inside.”
It’s common to see Windows black screen of death after login with a cursor, no display, no options, just nothing. For years of experience in the IT field, the laptop with “LED light on, hard drive spinning, but no display” issue frequently happens to users, especially when Microsoft pushes a Windows operating system update. And the corresponding troubleshooting can be found anywhere on the internet, most will be related to a Windows reset or component reset, which wipes hard drive data.
Part 1: Recover Data When Screen Remains Blank or Black
So, if you care about your data, try to access your hard drive at the very first. Among the multiple approaches, we recommend you the easiest one. You can easily copy the data to another drive or using data recovery software. EaseUS disk data recovery software is designed to serve people who have trouble in data recovery or accessing the hard drive.
Remember to take out the hard drive and recover data from it. Connect the hard drive to another computer and then using the data recovery software that doesn’t need any technical know-how and minimizes data risks: Download for PCDownload for Mac
Step 1. Select and scan hard drive.
On EaseUS Data Recovery Wizard, select the drive where you lose your data and click “Scan”. Wait patiently until this program finishes the scanning, it will find all your lost data on the drive.

Step 2. Find and preview found files on the selected drive.
Check “Deleted Files”, “Lost Files” or use “Filter”, “Search” to find the lost files on the selected hard drive. You can double-click to open and check the found files.

Step 3. Recover and save lost hard drive data.
Select all found lost hard drive files, click “Recover” and browse another secure location to save them. Click “OK” to confirm and finish the recovery process.

If your hard drive contains the system, you can refer to this guide: Migrate OS to SSD/HDD.
Part 2: Fix No Display Issue on HP/Acer/Asus/Dell/Lenovo Laptop
With data safely transferred, now you can begin the repair procedure by carefully follow the solutions below, which are proven to be useful in fixing most laptops turning on but displaying nothing on the screen issue.
Method 1: Performing A Hard Reset
Your laptop manufacturers should allow you to hard reset or factory reset your machine when it has trouble in starting up or malfunctioning in other ways. If you have no idea about how to do the hard reset, try to contact the manufacturer or seek help on the official support forum. This manner removes data and apps, still, it deserves an initial trial since it resolves the display blank or black issue mostly. Here, we take HP laptop as an example:
- Step 1:Turn off the laptop. Remove the laptop from any port replicator or docking station.
- Step 2:Disconnect all external connected peripheral devices such as USB storage devices, external displays, and printers. Unplug the AC adapter from the laptop
- Step 3:Remove the battery from the battery compartment.
- With the battery and power cord unplugged, press and hold the “Power button” for about 15 seconds to drain any residual electrical charge from the capacitors.
- Step 4:Insert the battery and plug the AC adapter back into the laptop, but do not connect any of the peripheral devices.
- Step 5:Press the “Power button” to turn on the laptop. The laptop starts normally or a startup menu opens.
- Step 6:If a startup menu opens, use the arrow keys to select Start Windows Normally, and then press “Enter”.
After Windows opens, reconnect each peripheral device that was disconnected, one device at a time, until all devices are reconnected.
Method 2: Connecting An External Monitor to Test The Display
To exclude the factor that your laptop monitor has been damaged or not working properly, try to find a normally working monitor and connect your laptop to it. You can connect most monitors and other display devices like projectors using the VGA, DVI, HDMI or DisplayPort cables.
- Step 1:Connect an external monitor to the laptop.
- Know the video connectors on your computer and display devices to avoid problems and get the best possible picture quality.
- An HDMI connection can also carry audio. HDMI audio is lost when using a DVI to HDMI adapter or cable solution. You cannot connect DVI-D to VGA.
- Step 2:If the computer screen does not display on the external monitor, press F4 until the screen image displays.
- Step 3: If an image displays on the external monitor, there might be a graphics driver conflict with the laptop LCD display. Download and install the latest graphics and chipset drivers for your specific computer.
- Step 4:If you can hear sounds of operation but no image is visible on either display, you can change a monitor or send the laptop for service.
Method 3: Reseating The Memory Modules
If a memory module is loose, it usually causes a laptop not displaying an image. So, reseating the memory modules might resolve either a blank or black screen issues on a laptop. By removing the AC adapter from the laptop, removing and reseating the memory module and then reconnecting the AC adapter to the laptop, you can finally make it.
- Step 1:Turn off the laptop, and then disconnect the power cord. Before beginning any procedure, touch a grounded metal object to discharge static electricity.
- Step 2:Remove the cover to access the memory.
- Step 3:Remove memory modules in the laptop.
- Step 4:Reinsert all memory modules.
- Step 5:Replace the cover, battery, and power cord. Turn on the laptop.
- Step 6:Perform any tests to verify that the laptop can start up and run in the Windows operating system.